SiteGround has one of the top reputations in the web hosting industry. Over 2 million domains are hosted on the platform.
That’s one of the many reasons why SiteGround made my list of the top web hosting services on the market today.
For those of you who are new to hosting your website with SiteGround, you might be wondering how to navigate your dashboard. Fortunately, if you read any SiteGround web hosting reviews, you’ll quickly learn that the platform is very user-friendly.
SiteGround uses cPanel, which is a highly responsive web-based control panel that’s used for managing your settings and account.
cPanel runs on Linux and is extremely versatile. It’s where you’ll customize your site and web hosting needs. SiteGround cPanel is well designed so anyone can use it, regardless of their technical skill level.
With cPanel, you’ll be able to do things like:
- Install WordPress (or another CMS)
- Back up your site
- Review resource usage
- Make changes to your server
- Set up emails
- Connect domains to your hosting plan
- Manage databases
- Manage security
As you can see from this list, the web-based control panel from SiteGround is very flexible.
I’ll show how to perform certain tasks with cPanel, to optimize your experience using SiteGround for web hosting.
Account Usage Statistics
If you want to know how much web hosting resources you’re using, you’ll need to navigate to the “statistics” section of your cPanel menu.
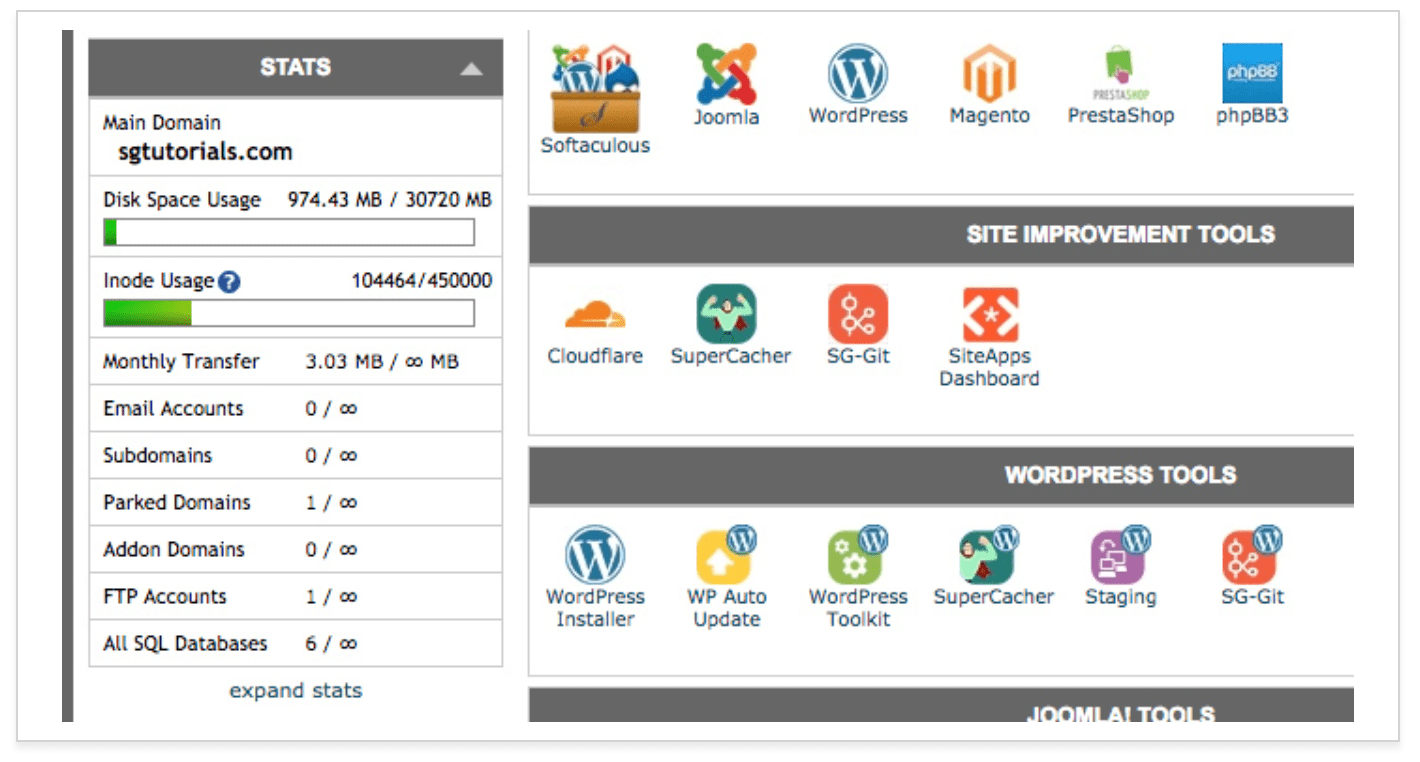
On this page, you’ll be able to see if you’re coming close to exceeding your plan limits.
In the screenshot above, you can see that disk space and inode usage are nowhere near capacity, so the plan is suitable from those standpoints. But if those bars were full, you’d want to upgrade to a higher plan to ensure that your site performance isn’t compromised.
This is just a quick overview. But if you want to see even more information, click on “expand stats” at the bottom left side of the page.
Now you’ll be able to see CPU time usage over the last two hours and 24 hours, as well as account executions over those same periods of time. The detailed stats will also show you all of the processes that are currently running on your account.
You can even view detailed graphs about your account executions and scripts.
Seeing this information on a chart is a great visual tool for analyzing your data. You can view the information for the day or for the week to gauge when you’re using the most resources.
This page will also show the top executed scripts, as well as the top IP addresses that access your site. You can use this data to protect against brute force attacks.
Visitor Logs
The cPanel visitor statistics has three main sections related to who is navigating to your website.
- Raw access logs
- Error logs
- Awstats
Here’s a look at an example of the raw access log.
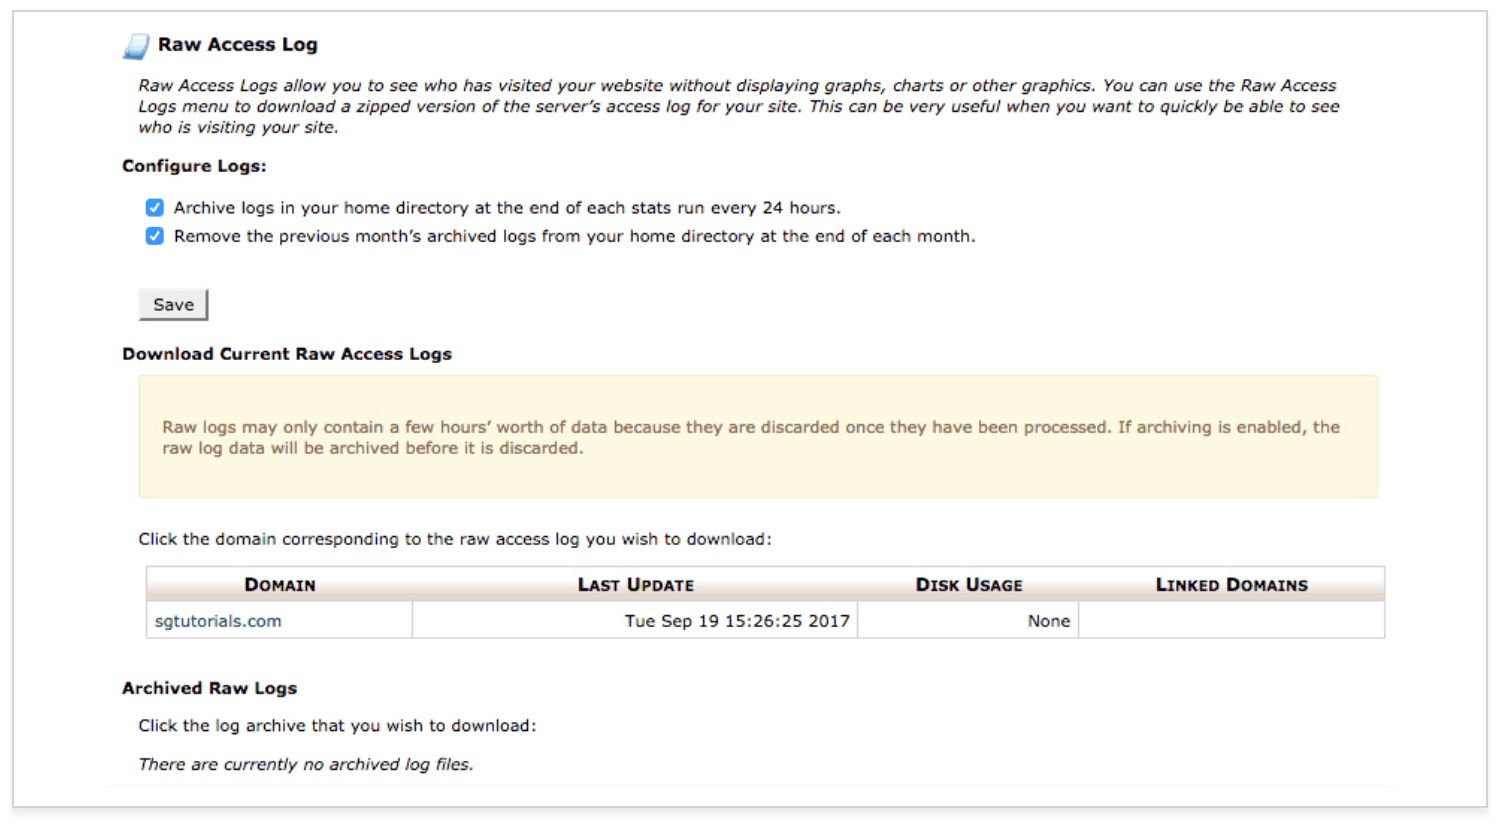
If you want a quick way to see who has been visiting your website, the access log is the best place to find that information.
This tool shows you who visits your site, but without displaying any visuals or graphics. You have the ability to download a zip file of your access log as well.
As a webmaster, you always want to make sure that your site is running as smooth as possible.
Any problems with your website will impact the user experience, which is why the error log is located in the visitor logs area.
Your error log will show you any recent errors on your website, such as broken links or issues with files. I’d recommend checking this log often, so you can identify and address any errors as soon as possible.
The Awstats menu gives you an in-depth analysis of your website visitors. Some of the top statistics included here are:
- Unique visitors
- Number of visits
- Pages opened
- Hits
- Bandwidth
- Top 25 countries
- Top robots and spiders
- Duration of visits
- Top files accessed
- Top pages
- Top operating systems
- Top browsers
- HTTP error codes
You’ll also have access to a quick summary of this information on a table. SiteGround cPanel will let you know the last time this information was updated. You can always click “update now” to view the data in real-time.
File Manager
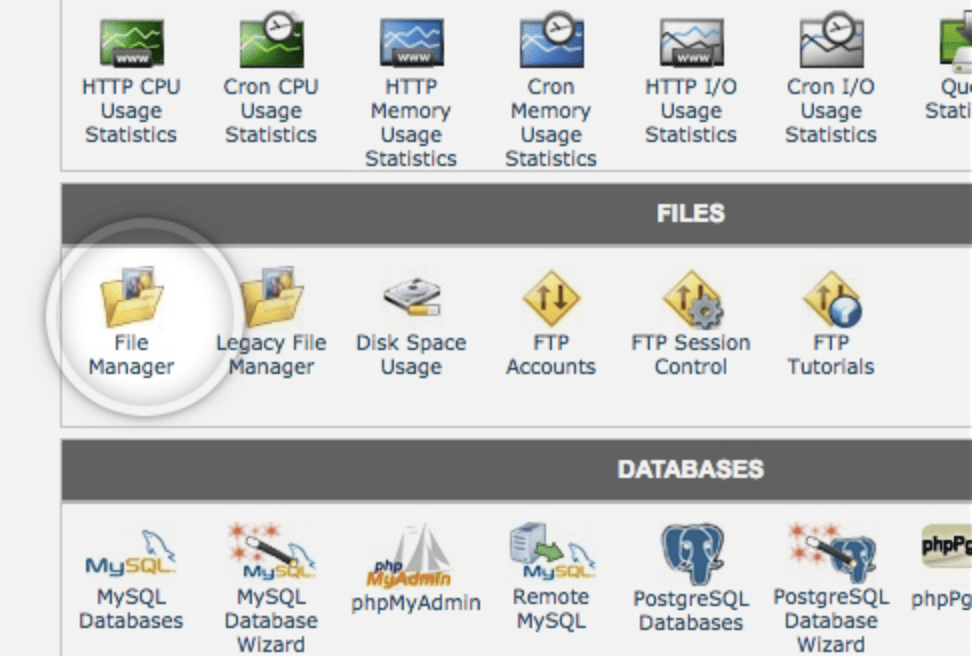
With the cPanel file manager, you can manage your website using HTTP as opposed to a third-party app or FTP tools. The file manager isn’t advanced as other tools, but it’s perfect for managing basic functions.
You can access the file manager by navigating to the files menu of cPanel.
The best way to keep your files organized is by adding new folders. Keeping your folders neat will make it easier for you to perform site maintenance down the road.
Adding new files to folders is as simple as clicking the “upload” button at the top of the page. All you have to do is choose the file location of your upload, and edit any permissions for the file.
If you’d rather create a file directly on cPanel, as opposed to your computer, just click on the “new file” button. Although I’d only recommend this for smaller file sizes.
Once files have been uploaded, you may want to edit them in the future. That’s no problem.
Just find the file name and click on the “edit” button on the main toolbar. This will let you make changes to your site without being forced to upload an updated version of that file. However, this is not recommended for big changes.
The file manager also allows you to extract files, compress files, and move files to another location.
Backup Management
SiteGround has automatic daily backups for things files, folders, and email accounts. You can also create manual backups on your own.
If something happens and you need to perform a file restoration, you can do this from the cPanel backups manager. Just click on the “backup tool” button.
From here, you’ll have access to a calendar showing all of your backups. If you click on one of the dates marked with a circle, you’ll see potential backups that you can use for restoration.
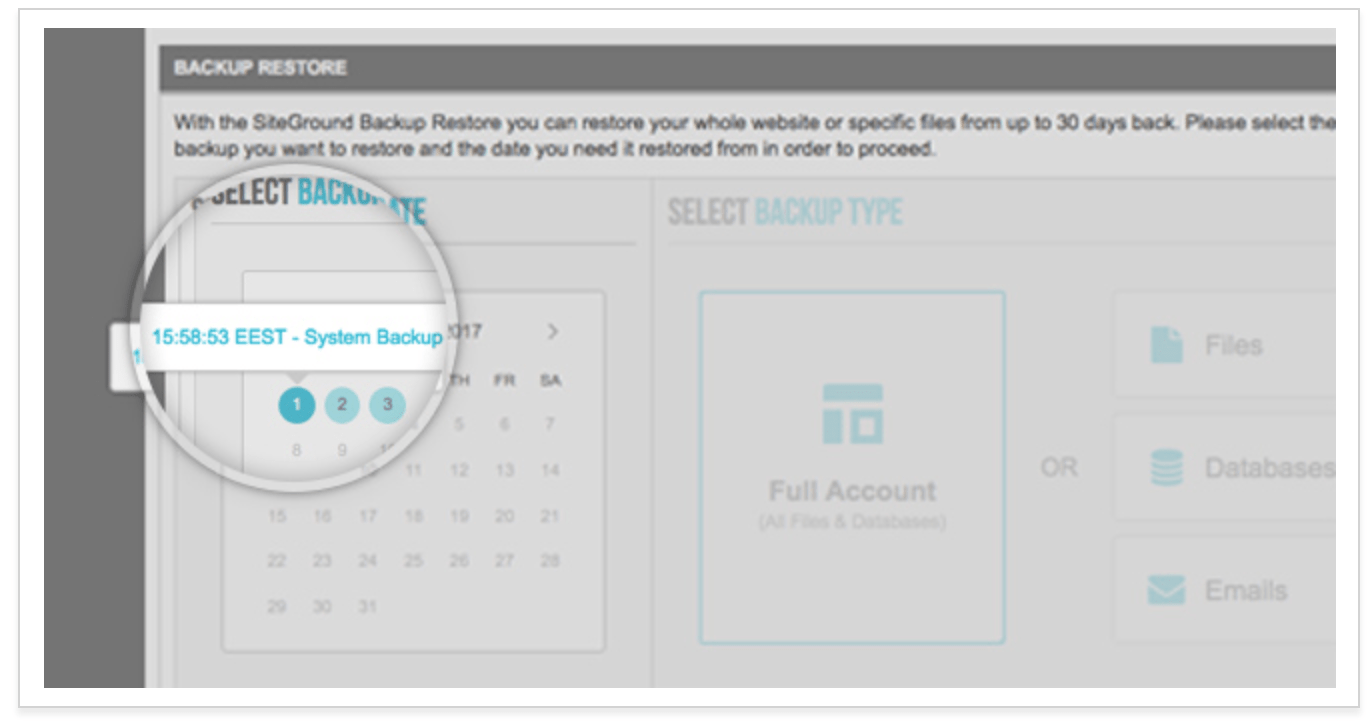
Once you click on that date, you can decide what files need to be restored. These are your options:
- Files
- Databases
- Emails
For files, you’ll be able to manually choose which folders need to be restored. Just scroll through and check off any boxes that were compromised and then click on the “restore” button.
SiteGround gives you the option to restore your files without replacing the ones that are currently being used.
Both databases and emails can be restored in the same way as other files. You simply navigate to the calendar, choose the date, and select the files that need to be restored.
Additionally, you can restore your entire account with SiteGround cPanel. This is the best option for those of you who aren’t sure exactly what files need to be restored. Choosing this function does not restore emails. So you’d still need to do the emails separately.
It’s also worth noting that the full account restoration impacts all domains on your hosting plan.
So for those of you who have more than one website, they’ll all be restored to the date of your selected backup.
Security
Website security needs to be a priority for all sites. SiteGround makes this easier for its customers by supporting Let’s Encrypt. All SiteGround plans come with a free SSL certificate.
If you navigate to the security section of cPanel, you’ll see an icon for Let’s Encrypt.
After you click on that icon, you’ll see an active list of your SSL certificates.
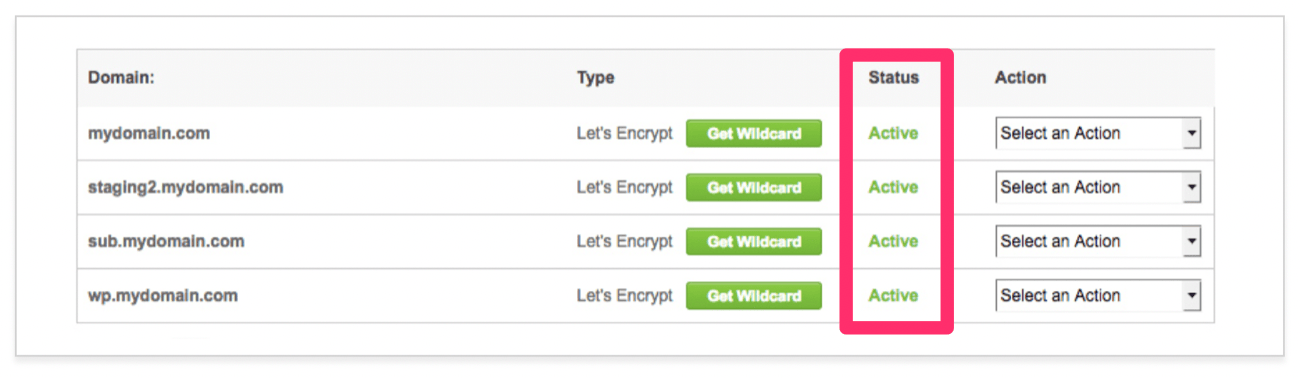
You can manually install any SSL certificates that aren’t active. Just click on the domain choose the type of certificate that you want to install.
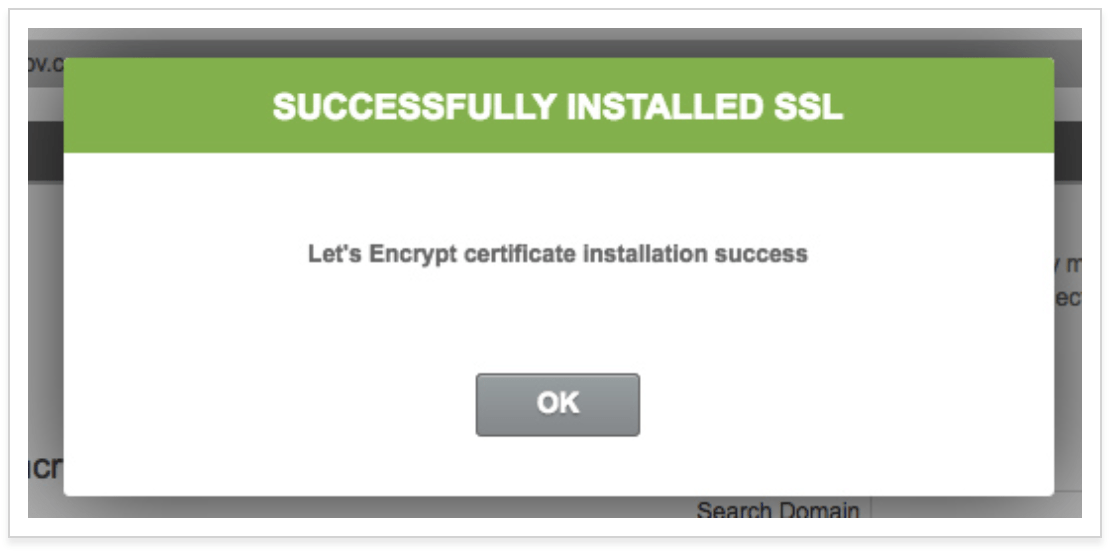
Once that’s complete, you’ll see this pop-up verifying that the installation was a success.
After the certificate has been issued, it still needs to be configured on your site. Otherwise, your domain could have duplicate content running simultaneously over HTTP and HTTPS.
You might have to rewrite links so that mixed content warnings and errors don’t appear.
To configure your certificate, just choose “HTTPS settings” from the action menu. Then turn on HTTPS enforce, which will force your site to work on HTTPS.
All HTTP redirects will be performed at the server level. This is a great shortcut, so you won’t have to do hire a developer to do it for you.
In order for your SSL certificate to work, it needs to meet the following prerequisites:
- Your domain and subdomain need to be pointed to the IP address of your cPanel account.
- The hosting server needs to control the DNS zone for domain names with a wildcard SSL.
- Temporary redirects need to be removed until the SSL has successfully been installed.
It’s also worth noting that any parked domains not pointed to your cPanel IP address would cause the SSL installation to fail. To work around this, just temporarily unpark them or point them to the cPanel account until the installation is complete.
Advanced Settings
You can also manage some more advanced options with SiteGround cPanel. “Chron Jobs” is something that you might want to consider setting up in the advanced menu.
This will let you run specific commands based on times set by the cron job. For example, you can set this up to delete temporary files each week so that you don’t waste disk space.
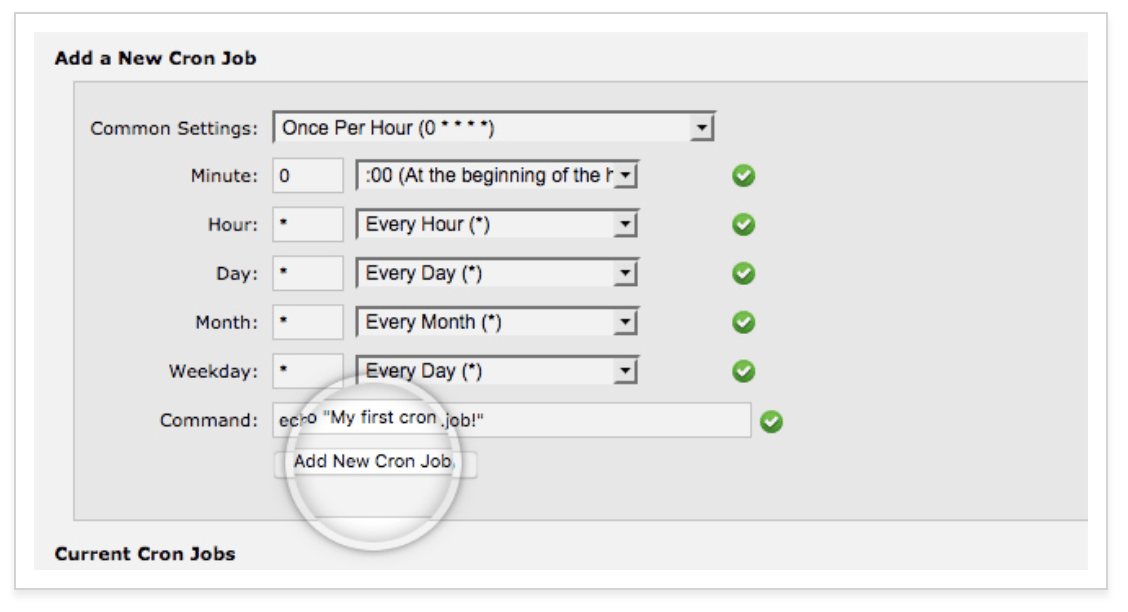
cPanel will email you every time a command is run with a cron job.
To add a new cron job, just adjust the settings for a specific command. Here’s an example of what that menu will look like in cPanel.
If you don’t need a cron job anymore, just click on the “delete” button to remove it.
Changing the PHP version is another advanced cPanel task that you might want to use. The PHP version manager icon can be found in the “1H Software” section of your cPanel dashboard.
Click on the folders and choose the directory that you want to change. Keep in mind, any subdirectory will be changed as well.
You’ll also be able to change the entire website. Just choose your new PHP version from the list of options and save your changes.
I’d suggest running your site on the “managed PHP version.” This will automatically run your site on the recommended PHP whenever it becomes available. So you won’t have to do anything manually, and your site will always be running a stable and secure PHP.
Conclusion
There’s a reason why SiteGround is so popular. cPanel makes it easy for its web hosting clients to manage all of their hosting and website settings in one place.
As you can see from what I’ve covered in this guide, the options are extremely versatile.
So if you’re new to SiteGround and don’t know how to navigate the cPanel, use this tutorial as a reference.
For those of you who are considering SiteGround for web hosting, but haven’t signed up yet, this information should make your decision that much easier.
If you review my resource on the best web hosting for small business, you’ll see that I named SiteGround as the choice for the best technology. cPanel was a big factor in that decision.


No comments:
Post a Comment