Transfer your domain easily by signing up with GoDaddy and centralize all your domains in one place. Right now, you can transfer a domain for as low as $9.99 and get free registration for a year. Get started today.
There are many reasons you might want to transfer a domain. Maybe your web hosting plan has gone up, or you don’t like the support your host is giving. Whatever the reason, having all your domains in one place with a hosting plan tailored to your needs is a good idea.
But sometimes, that means you need to transfer a domain you already own. A lot of people don’t do this because they think it’s expensive or complicated, but it actually only takes a week at most. In this article, we’ll break down the six simple steps you need to take to transfer your domain from one registrar to another.
The 7 Best Domain Registrars For Transfering a Domain Name
When you transfer a domain, you want to make sure you’re moving it to a registrar that’s secure, affordable, and responsive. We’ve reviewed dozens of domain registrars and put together a list of our favorites. Our top picks are:
- GoDaddy — Best for domain protection and privacy
- Hostinger — Best for bundling domain registration and web hosting
- Porkbun — Best for creative domain extensions
- Domain.com — Best for fast and simple domain purchasing
- Network Solutions — Best for long-term domain registrations
- Namecheap — Best for affordable domain registration
- NameSilo — Best for buying domains in bulk
If you want a detailed breakdown of each and why we recommend them, you can see the full review here.
Transfer A Domain Name in 7 Easy Steps
Transferring a domain name is easy, but it’s only fast if you follow the right steps and get the right information ready. Here are the six steps you should take to make the transfer go as easily as possible:
- Sign Up for GoDaddy
- Make Sure Your Domain Is Eligible
- Unlock Your Domain
- Get an Authorization Code
- Add Your Domain To Your New Registrar
- Update Your Domain Details In GoDaddy
- Delete Your Old Registrar Account
For this tutorial, we’ll be using GoDaddy. It’s one of the most reputable domain registrars and hosting providers and has very affordable domain transfer rates, which is why we recommend it. Sign up now to transfer your domain for as low as $9.99, which includes free registration for a year.
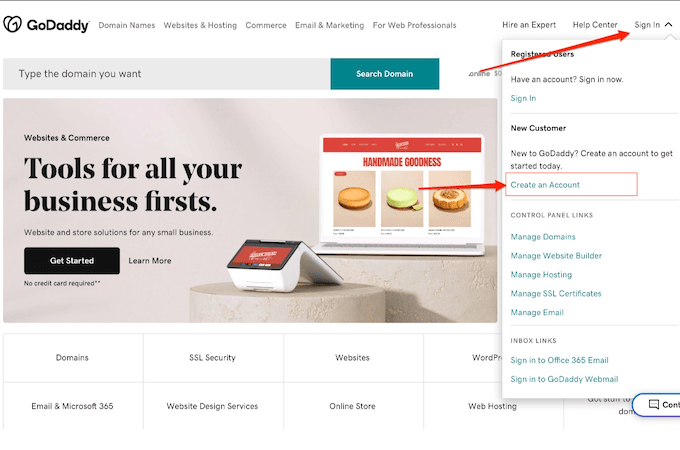
Step 1: Sign Up for GoDaddy
The first step to transferring your domain name is to get signed up with your new registrar.
Our recommendation is GoDaddy, the registrar we’ll be using for this tutorial. Not only is GoDaddy affordable and popular, but it’s also secure, which is something you should look out for when choosing a domain host.
To start, head to GoDaddy’s home page and select sign up. Then, select create an account, add your details, and continue.
Once your account has been created, you can go to your GoDaddy dashboard and move on to the next step.
Step 2: Make Sure Your Domain Is Eligible
Now that you’ve created a GoDaddy account (or an account with another registrar, if you prefer), you need to make sure your domain is eligible for transfer.
Some domain registrars or hosting providers have specific rules about when and how you can transfer. For example, many will not let you transfer if you have changed your domain or purchased it within the last 60 days.
You also need to ensure that your domain information is up to date, including your address, your billing information, and the email associated with your account. Many people use business emails that include their domain name, and this might be shut off when you transfer yours, so make sure you have something in place in case this happens.
Once you have updated all of your information and you’ve checked your registrar’s rules about transferring a domain, you can move on to the next step.
Step 3: Unlock Your Domain
To transfer a domain, you need to unlock your current one.
Sometimes, depending on who you are currently registered with, you can do this yourself with the click of a button through your dashboard. You can see, for example, with Bluehost, that you just need to toggle the lock settings off:
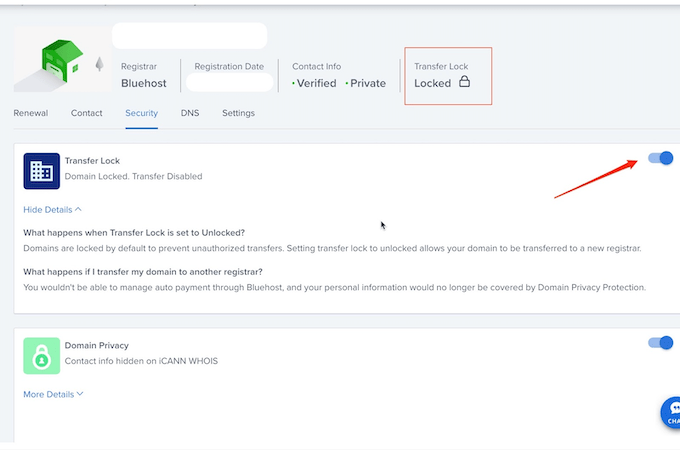
However, with other registrars, you have to email and contact your registrar to get permission to unlock your account.
Check the rules for your registrar, and look through your dashboard to see if any buttons say “Unlock Domain.” If not, email customer service to let them know that you are requesting to unlock the domain.
Make sure you have all of your personal information ready in case you need to prove that you are the domain owner, including login and billing details.
Once your domain is unlocked, you can move on to the next step.
Step 4: Get an Authorization Code
Once your domain is unlocked, you need to get an authorization code.
This is a short code that you need to give to your new registrar (in our case, GoDaddy) to prove that you own this domain. This is to stop other people from stealing and transferring your domain.
Again, some registrars will let you generate or request a code directly from your user dashboard, which will make the process much faster.
Others, for added security, require you to send an email requesting a code. You should receive an answer in your code within five days of making the request, but this can add an extra week to your domain transfer. You can see that Bluehost, for example, requires you to request a code via email:
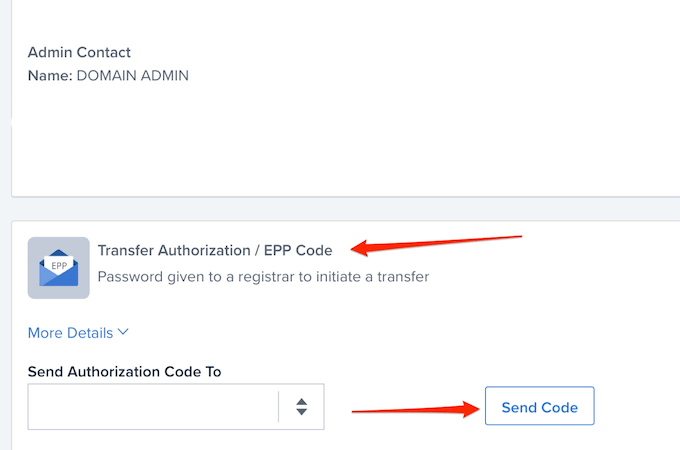
Again, be prepared to prove that you own the domain with your login details. Once you get your authorization code, you’re all set to make the transfer.
When you’re ready, move on to the next step.
Step 5: Add Your Domain To Your New Registrar
You should now have all of the information you need to transfer your domain.
Login into your GoDaddy dashboard, go to Domain Names and select Transfer Domain Names.
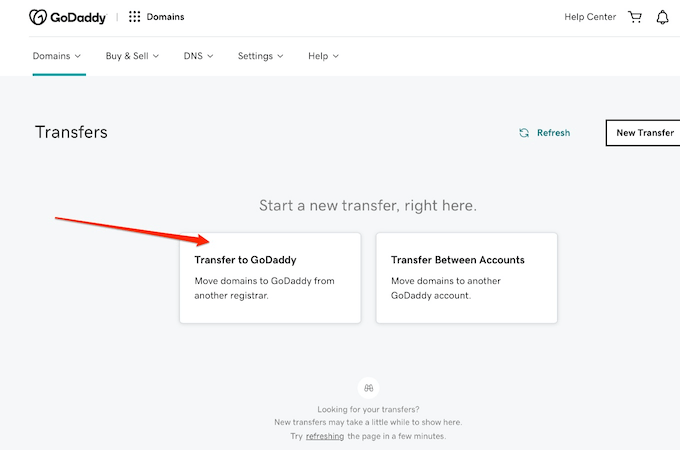
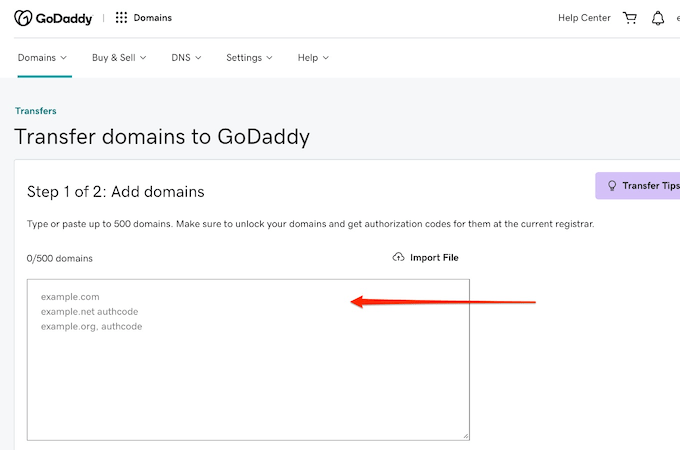
Then, add your domain. It’s recommended to add your full domain, including the https://, as it will make the process faster. You can also add your authorization code at the same time, next to your domain, to speed up the process.
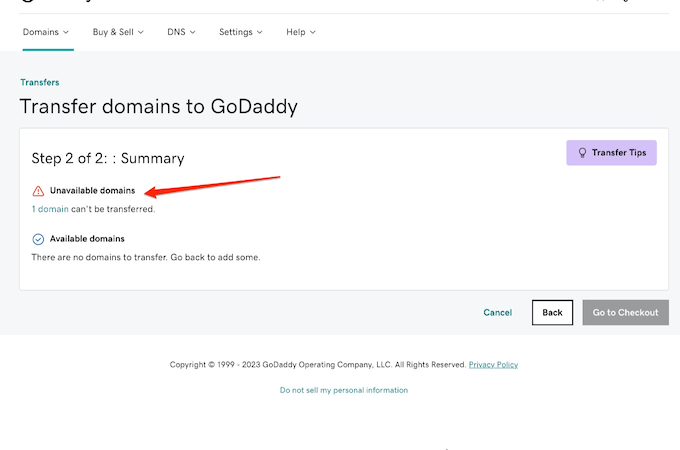
If there is a problem with your domain, like an issue with permissions, or a spelling mistake, GoDaddy won’t let you move on to the next step. If you see a problem, go back and check your domain, and contact your current registrar to make sure it’s actually unlocked.
Once your domain is accepted, you can pay for the transfer. GoDaddy has very affordable rates, usually at only $9.99 for a year, which is one of the reasons we recommend them.
Once you have entered your payment details, you just need to wait for the process to be finalized and for your transfer to be authorized. This usually takes a few days but can take up to a week. If there are any problems, GoDaddy should email you for verification.
Once your domain has been transferred, you can move on to the penultimate step.
Step 6: Update Your Domain Details In GoDaddy
The last thing you’ll need to do is update all of your information in GoDaddy and check that your domain is working properly.
First, go to your settings, and update your personal information to ensure everything is correct.
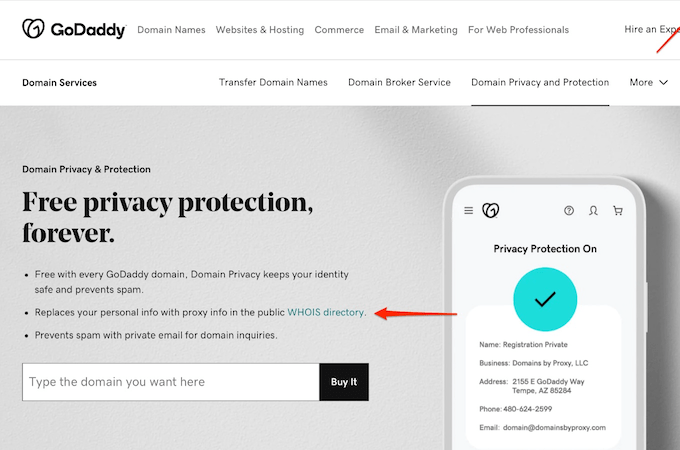
Then, check the settings for your domain, including privacy settings, to make sure only the information you want public is set to public. GoDaddy offers free domain privacy to all users, but it’s still important to check and make sure your transfer didn’t make all your details public.
Then, check your domain to make sure it is live and that there are no error messages when accessing it from a private browser. Once you’ve done this, your transfer is complete!
Move on to the last step, and you’re done.
Step 7: Delete Your Old Registrar Account
Now that you are set up with your new domain in GoDaddy, you need to cancel your account with your old registrar.
Make sure that once your domain is transferred, any settings like auto-renewal or payment plans and plugins are left active with your old hosting provider. Move anything you need over to GoDaddy, and then close your account.
This will avoid any confusion down the line and avoid any glitches with your website after you move your domain.
Once this is done, you’re finished, and you can start running your site from your new registrar.
Final Thoughts About Transferring a Domain Name
Transferring a domain name is only hard if you don’t follow your registrar’s instructions or follow the process step by step. As long as you unlock your domain and get your authorization code, it shouldn’t take longer than a week to get set up with your new registrar.
And considering how easy the process is, it’s worth moving your domain if it means better site speeds, a more affordable plan, and one registrar for all your domains.
https://www.quicksprout.com/how-to-transfer-a-domain-name/
No comments:
Post a Comment